You will need:
- For each student, a piece of square paper ("8.5x 8.5" or larger).
- For each student, a pair of scissors.
- For each student, a couple of quarters or any object of that weight (e.g., small rock, small candy bar)
paper scissors fold unfold middle point together triangle cut turn over corner direction opposite end middle carefully lift hang
Instructions:
Click on the
thumbnail image if you want to see a larger picture. Teachers who use a screen reader
should ignore the links to the larger images, as the screen reader will read the instructions in order.

1. Fold the paper, bringing together the two opposite ends (tips).
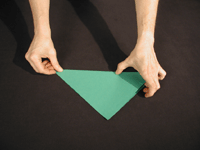
2. Crease the fold in the middle.
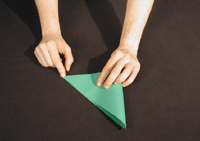
3. Fold the paper again, bringing together the two opposite ends, creating a right-angle triangle.
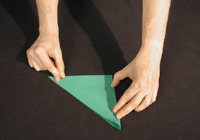
4. Crease the fold.

5. Fold one more time, repeating steps 3 and 4.

6. Hold the triangle with the folded edge on your left and the tip down.
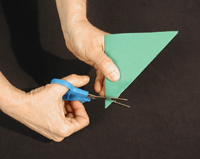
7. Starting .25" from the bottom, make a straight cut from the straight edge to about .25" from the diagonal edge.
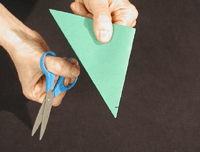
8. Turn the triangle over (rotate horizontally). The straight edge is now on your right.
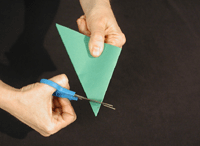
9. Starting .25" from the first cut, make a straight cut from the diagonal edge to about .25" from the straight edge.

10. Turn the triangle over (rotate horizontally). The straight edge is now on your left.

11. Starting .25" from the second cut, make a straight cut from the straight edge to about .25" from the diagonal edge.
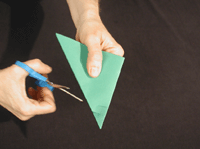
12. Turn the triangle over (rotate horizontally). The straight edge is now on your right.
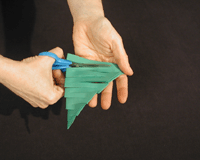
13. Repeat cutting and turning over the triangle until you reach the triangle base.

14. Unfold the paper very carefully.

15. Place the square on a flat surface and put a quarter or any small, heavy object in the center.
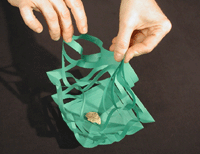
16. Bring together the four tips of the square. Lift the square by its tips, letting the weight of the quarter (or heavy object) pull down the bottom.

17. Enjoy the little basket! Hang it or just hold it for fun.
-
The Art of
Papercutting
Sr. Clarice Steinfeldt, SDS gives a very nice introduction to this ancient art that incorporates design and symmetry and is both decorative and functional. Sr. Clarice has links to pages on the History of Papercutting, an Online Gallery, and links to sites of English, German, Swiss, Russian and Chinese papercutters. On the Home Page of the American Guild of Papercutters to which she links, there is an explanation of what papercutting is and what it is not. There is also a listing of places that sell supplies for papercutters. -
Papercutting
Designs by Ellen Brown
The very useful information on this Web site comes from the author's book Papercutting Designs. This site also links to photos of many of the designs in Ms Brown's book.
