You will need:
- For each student, a piece of paper. A full-size newspaper would create hats of an average size.
paper fold unfold middle point together triangle crease turn over corner direction opposite end middle hat head on/on top put (place) remove
Instructions:
Click on the
thumbnail image if you want to see a larger picture. Teachers who use a screen reader
should ignore the links to the larger images, as the screen reader will read the instructions in order.

1. Fold the paper from top to bottom, bringing together the two opposite ends.

2. Crease the folded end.

3. Fold the paper from side to side, bringing together the two opposite ends.
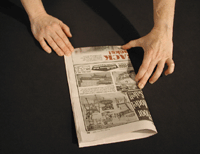
4. Crease the folded end.
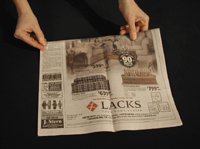
5. Unfold the paper once, noting the middle crease.

6. Fold the top left tip so that it touches the middle crease.

7. Crease the diagonal end.

8. This is what you should have now.

9. Fold the other tip so that it touches the middle crease, and crease the diagonal end.

10. Fold one bottom flap upward.

11. Crease this folded end.

12. Flip the paper over.

13. Fold the other bottom flap, and crease the folded end.
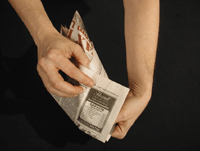
14. Tuck in the edges of the flaps so that they don't stick out. You may want to tape them.
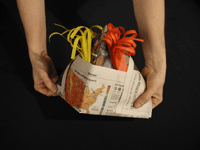
15. Decorate your hat.

16. Wear it! Talk about wearing hats.
-
Making Paper Hats
The Parent Site shows how easy it is to make a paper hat. -
Paper hats in the pressroom
Jason Laughlin of the Courier-Post wrote an article in which he pointed out that "Paper hats were once as common in a pressroom as ink and advertising inserts. Everyone working with the Courier-Post's printing press knew how to make square paper hats from newsprint to protect their hair from the ink that sprayed from the presses as they ran. They were less concerned with the rest of their bodies. - Paper Party Hats
Learn to make cone hats, simple paper hats, and sombreros for your next party at home. -
Japanese Samurai Hat
These well explained and illustrated instructions were authored by Enchanted Learning Software and should appeal to many students.
